We may receive compensation from the companies whose products we review if you click through our affiliate links. As an Amazon Associate I earn from qualifying purchases.
So the filter replacement indicator is flashing on your air scrubber and you’ve lost the user manual, no worries we got you covered. Below we give the instructions on how to replace the filters for our list of the best air scrubbers.
Remember when replacing your filters to always wear the proper protective equipment and to dispose of the old filters by following local rules and regulations.
Table of Contents
How To Replace The Filters For The BlueDri AirShield 550
Taken from the user manual (BlueDri,AirShield 550, page 2)
Unplug the air scrubber
Open door by releasing sliding latches outward, away from the air scrubber body.
Remove used filters and install new filters. If both filters have been removed, the HEPA filter must be placed first , followed by the pre-filter.
Latch door closed and plug the unit in a grounded outlet before operating.
How To Replace The Filters For The Abatement Technologies Pred750
Taken from the user manual (Abatement Technologies, Pred750, page 11-12)
How to change pre-filter
With the unit operating, turn the two latches on the pre-filter access door counterclockwise (approx ½ turn), swing the latches outward, and open the door. Remove the first-stage filter located inside the door itself and replace it with a new one.
Close the door and lock it in position by swinging the latches inward and turning the latch clockwise. Make sure the door is flush against the unit’s cabinet before closing the latch
If the Filter Change Indicator light remains “ON” after changing the first-stage filter, the second- stage filter should be replaced
How to change second-stage filter
Open the pre-filter access door by turning the two latches counterclockwise (approximately 1 /2 turn), swing the latches outward, and open the door.
Remove the second-stage pleated filter and replace it with a new one. The pleats on the air filter should be oriented so that they are vertical and the air flow directional arrow on the filter should point toward the control panel. 11 Note: If an alternate VAPOR-LOCK® filter is being used, be sure to remove it from its poly bag before installing it in the unit. VAPOR-LOCK® filters are packaged in poly bags to preserve the integrity of the carbon granules.
Close the door and lock it in position by swinging the latches inward and turning the latch clockwise. Make sure the door is flush against the unit’s cabinet before closing the latch.
If the Filter Change Indicator light remains “ON” after changing the second-stage filter, the HEPA filter should be replaced.
How to change HEPA filter
Turn the unit “OFF” and disconnect the unit’s power cord from the electrical outlet.
Open the pre-filter access door by turning the two latches counterclockwise (approximately 1 /2 turn), swing the latches outward, and open the door.
Remove the second-stage pleated filter. The HEPA filter is located behind the pleated pre-filter.
The HEPA filter is held into place by two metal brackets. Remove the two screws from each bracket and then remove the HEPA filter from the machine.
Insert the new HEPA filter with the pleats oriented vertically and the air flow directional arrow on the filter pointing towards the control panel (the gasketed side of the HEPA filter will be against the internal wall). Note: The HEPA filter is delicate and should be handled with care. When removing or reattaching the HEPA filter retaining brackets, do not touch the filter media; otherwise, damage to the filter and leakage of contaminated air could result.
Replace the two metal brackets and secure the brackets with the screws. Important: Do not use a power screw driver or drill to tighten the screws down as this may strip the screw head; tighten with a manual screw driver only.
Insert the second-stage pleated filter into the machine. The pleats on the air filter should be oriented so that they are vertical and the air flow directional arrow on the filter should point toward the control panel.
Close the door and lock it in position by swinging the latches inward and turning the latch clockwise. Make sure the door is flush against the unit’s cabinet before closing the latch. Note: The HEPA filter is not designed to be cleaned and using methods such as compressed air in an attempt to clean the filter can cause damage to the filter and comprise the HEPA filter efficiency rating.
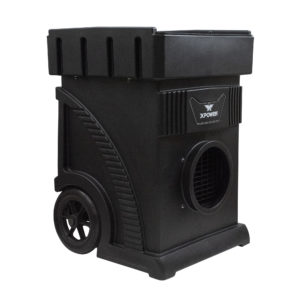
How To Replace The Filters For The Dri-Eaz HEPA 700
Taken from the user manual (Dri-Eaz, HEPA 700, page 2)
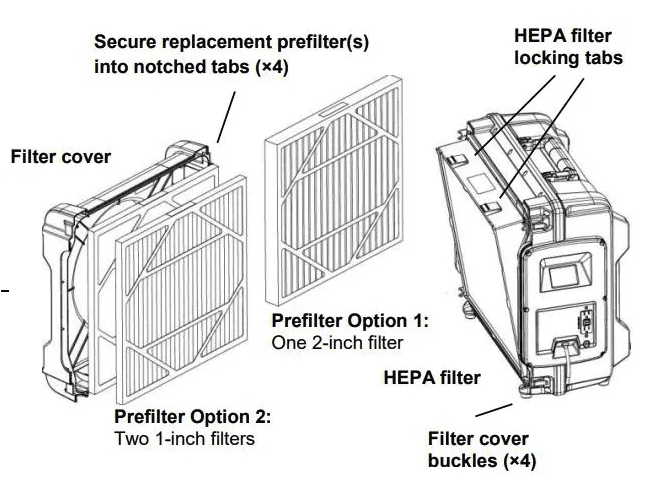
How to replace the Pre-Filter
Lay unit on its back and release the four (4) buckles. Lift off the filter door.
Remove the prefilter from the filter door and discard. Remove the prefilter from the filter door and discard.
Insert new prefilter into filter door. Ensure that the prefilter is seated properly on the retention tabs.
Replace filter assembly on unit and reattach four buckles.
How to replace the HEPA filter
NOTE: Performance is reduced when a non-Legend Brands primary filter is installed. For maximum filtration performance, use only Legend Brands filters. Do not clean and reuse the HEPA filter. Always replace the prefilter when replacing the HEPA filter.
Lay unit on its back and release the four (4) buckles. Lift off the filter door.
Remove the prefilter from the filter door and discard.
Replace HEPA primary filter, handling it with care, as filter is easily damaged. Do not use a filter that is damaged.
Place new prefilter(s) in filter door. Replace filter cover and lock the four buckles securely.
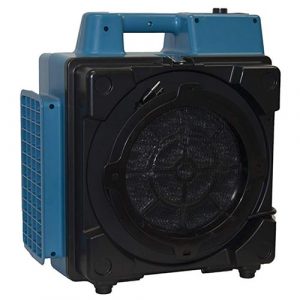
How To Replace The Filters For The AlorAir PureAiro HEPA Max 970
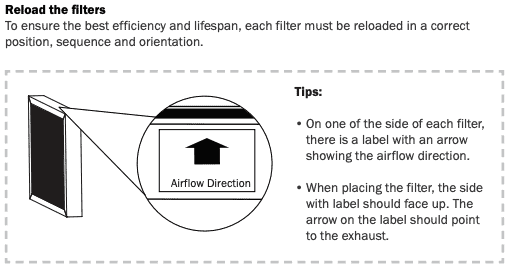
Taken from the user manual (AlorAir, PureAiro HEPA Max, page 4)
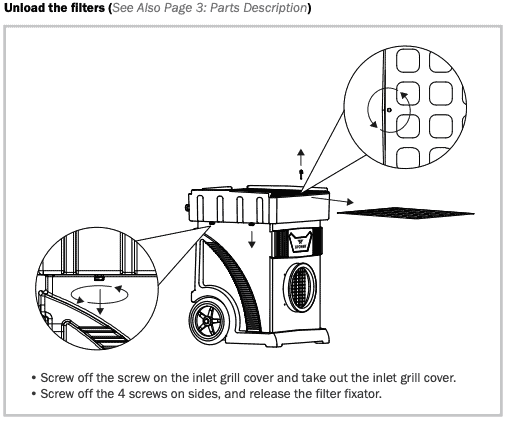
Loosen the 4 locks that hold the filter board in place.
Slide out the filter panel board
Remove the used filters and replace the new filters
Remember to place the filter in the correct order. If all filters have been removed the HEPA should be placed first, followed by the carbon filter, then the pre-filter.
The pre-filter should always be the first filter air passes through.